How to Build a PC in 2026 (Complete Beginner Guide)
Picking compatible parts, avoiding common mistakes, and assembling your first build — from zero to POST.
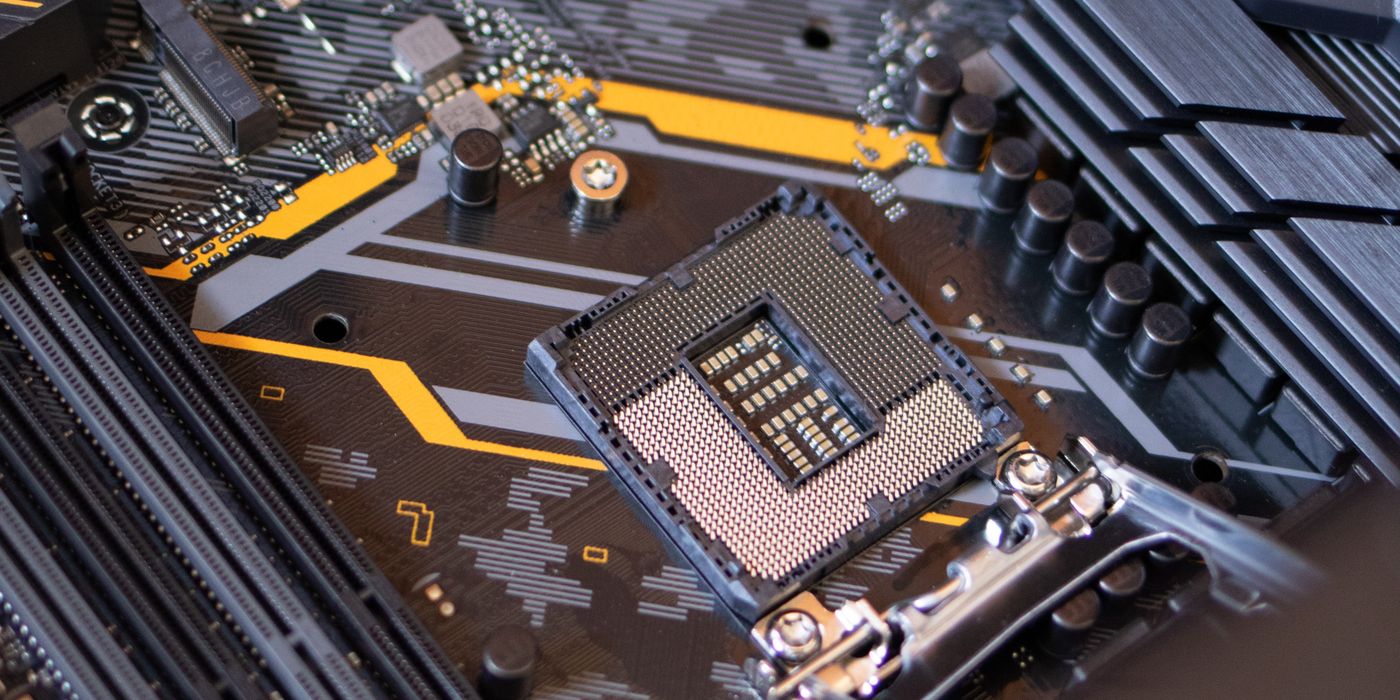
Building your own PC sounds intimidating until you do it once. The process is slower than watching YouTube makes it look, and some steps require patience — but it is not technically difficult. There are no soldering irons, no advanced tools, and no engineering knowledge required. If you can build flat-pack furniture, you can build a PC.
This guide covers everything from choosing parts to first boot: why building beats buying in most cases, what each component does, how to avoid the mistakes that trip up first-timers, and the exact assembly sequence that works.
Why build instead of buy?
The honest answer: cost per performance. At any given price point — $700, $1,000, $1,500 — a custom build will get you meaningfully more GPU than a pre-built from Best Buy or Dell. Pre-builts bundle in costs you do not see: assembly labour, slim margins on components, Windows OEM licences, and often a mediocre PSU and case that would be hard to justify choosing yourself. You pay for all of that.
Building also means you know exactly what is in your machine, you choose every component to your needs, and upgrading later is straightforward — swap out one part, not the whole system.
When buying pre-built makes sense
Pre-built is the right call if you have no interest in the process and your time is genuinely limited. A professional billing $150/hour who needs a machine by Friday should buy pre-built — the assembly and troubleshooting time is not worth it. Content creators who need a warranty-backed system and cannot afford downtime also have a reasonable case for a pre-built. If that is you, no shame in it. Everyone else: build.
The parts list — what each component does
A PC has eight core components plus a cooler and thermal paste. Here is what each one does and what to know before buying.
CPU (processor)
The CPU is the brain — it handles general computation, runs your operating system, and feeds data to the GPU. The two main options in 2026 are AMD Ryzen and Intel Core. Both are excellent. AMD currently leads on efficiency and multi-core performance; Intel competes on single-core speed and integrated graphics options.
“Cores” in practice: more cores help with video editing, 3D rendering, and streaming while gaming simultaneously. For pure gaming, the difference above 8 cores is marginal — a Ryzen 5 or Core i5 class chip is the sweet spot for most builders.
Motherboard
The motherboard is what everything plugs into. The most important rule: the CPU socket must match the motherboard socket. AMD Ryzen 7000 and 9000 series processors use the AM5 socket. Intel 13th, 14th, and Ultra series use LGA1700 or LGA1851 depending on the specific chip — check the CPU spec sheet. Putting a Ryzen CPU on an Intel board, or vice versa, is physically impossible, but buying the wrong socket is a common first-timer mistake.
Chipset tiers (B-series like B650 or B760 vs. X-series like X670E) matter mainly for overclocking and PCIe lane count. For most builds, a mid-range B-series board is the right choice.
RAM
16 GB is the floor for 2026 — it will feel tight within a year or two. 32 GB is the practical recommendation for any new build. New platforms (AM5, Intel 12th gen onwards) use DDR5. If you are building on an older platform, verify whether your motherboard takes DDR4 or DDR5 — they are physically incompatible.
Buy RAM in matched pairs (2 x 8 GB or 2 x 16 GB) for dual-channel operation, which meaningfully improves memory bandwidth. Check your motherboard’s QVL (qualified vendor list) if you want to guarantee compatibility, but most name-brand DDR5 kits (Corsair, G.Skill, Kingston) work without issue.
Storage
NVMe M.2 SSD — full stop. SATA SSDs are slower and waste a PCIe slot. Traditional spinning hard drives have no place as a primary drive in 2026; they are only useful as cheap secondary storage for large media archives. For the primary drive, 1 TB minimum. 2 TB is worth the extra $30 to $50 at current prices.
GPU (graphics card)
For gaming builds, the GPU is the most important component and usually the most expensive. The two main options are AMD Radeon (RX series) and Nvidia GeForce (RTX series). Nvidia leads on ray tracing and DLSS upscaling; AMD’s FSR is now competitive and works across more games and platforms. At the same price, compare benchmark scores for the specific games you play.
If you are building a budget workstation rather than a gaming rig, some AMD Ryzen and Intel CPUs have capable integrated graphics (iGPU) that handle basic tasks and light gaming. A dedicated GPU is only necessary if you plan to game seriously or work in 3D or video.
PSU (power supply)
Do not cheap out on the PSU. A low-quality power supply failing can take other components with it. Look for a unit with an 80+ Gold or better efficiency rating from a reputable brand (Seasonic, EVGA, Corsair, Be Quiet!). Modular or semi-modular PSUs are worth the small price premium — you only run the cables you need, which makes cable management far easier.
For sizing: estimate your system wattage using PCPartPicker’s built-in calculator (it uses TDP figures for each component), then buy a PSU rated for 120% of that estimate. A system pulling 450 W at load should have a 550 W or 650 W PSU — not a 450 W unit running at 100% all the time.
Case
Cases come in three main sizes: ATX (full-size), Micro-ATX (mid-size), and Mini-ITX (compact). Your case must fit your motherboard form factor — an ATX board will not fit in a Micro-ATX case. Measure your GPU length before buying a case; a high-end GPU (350 mm+) will not fit in some smaller cases.
Airflow matters more than looks. A case with good front intake venting and rear exhaust will run cooler and quieter than a flashy panel-heavy case with restricted airflow. Popular well-reviewed options: Fractal Design Pop Air, Lian Li Lancool II, Corsair 4000D Airflow.
CPU cooler
Non-overclocking Ryzen chips (those without an “X” suffix) typically ship with a stock Wraith cooler that is adequate. Intel stock coolers are mediocre — budget for an aftermarket cooler if you are on Intel. For any serious build, an aftermarket air cooler (Noctua NH-D15, DeepCool AK620, Thermalright Peerless Assassin) or a 240 mm AIO liquid cooler runs significantly cooler and quieter.
Thermal paste
Thermal paste fills the microscopic gaps between the CPU heat spreader and the cooler contact plate, improving heat transfer. Most aftermarket coolers ship with paste pre-applied or included. If you need to apply it yourself: a pea-sized blob in the centre of the CPU is correct. The mounting pressure spreads it. Do not try to manually spread it — you will introduce bubbles.
Budget tiers for 2026
$500 to $700 — Budget gaming (1080p, 60 fps)
A Ryzen 5 paired with a GPU in the RX 6600 or RTX 4060 class will handle 1080p gaming at 60 fps and above in most titles. You will compromise on storage (1 TB only) and case quality, and likely use the stock cooler. This tier is excellent value for a first build.
$800 to $1,200 — Mid-range sweet spot (1440p)
A Ryzen 7 or Core i5/i7 paired with an RTX 4070 class GPU is the best-performing dollar-per-frame tier in 2026. You get 1440p gaming at high to ultra settings, 32 GB of RAM, and a 2 TB NVMe drive without compromise. This is where most experienced builders land.
$1,500+ — High-end (4K / high-refresh 1440p)
A Ryzen 9 or Core i9 with an RTX 4080 or 4090 class GPU handles 4K gaming and demanding content creation workloads. At this tier, the CPU is rarely the bottleneck — the GPU is doing almost all the heavy lifting. The jump from mid-range to high-end costs significantly more for diminishing returns in most games.
Compatibility checklist
- CPU socket matches motherboard socket. AM5 for Ryzen 7000/9000. LGA1700 or LGA1851 for the relevant Intel generation. Verify both spec sheets.
- RAM type matches motherboard. DDR4 and DDR5 are not interchangeable. The slots are keyed differently so you cannot physically install the wrong type, but buy the right one from the start.
- GPU length fits case. Check your GPU’s length in millimetres against your case’s maximum GPU clearance spec.
- Cooler height fits case. Tower air coolers can be 160 mm to 170 mm tall. Most full-ATX cases clear 165 mm without issue; verify for compact cases.
- PSU wattage covers the build. Use PCPartPicker’s wattage estimate, add 20%, buy at or above that number.
- M.2 slots are available. If you are installing two NVMe drives, confirm your motherboard has two M.2 slots with the right key type (M-key for NVMe, B-key for SATA M.2).
Step-by-step assembly
Work on a clean, flat, well-lit surface — a kitchen table is fine. Keep your components in their anti-static bags until you are ready to install each one. Touch the metal of your case frequently to discharge static, or use an anti-static wrist strap clipped to the case.
Tools you will need
- Phillips head screwdriver — magnetised tip is strongly recommended. You will drop screws into tight spaces without it.
- Zip ties — for cable management. Buy a pack before you start.
- Good lighting — a desk lamp or headlamp. The inside of a case is darker than it looks on YouTube.
- Ground yourself. Touch the bare metal of your case before handling any component. An anti-static wrist strap clipped to the case is even better. Static discharge can damage components — it is rare with modern hardware, but costs nothing to prevent.
- Install the CPU into the motherboard. Open the socket latch or lever, align the CPU using the triangle marker in the corner (matches a triangle on the socket), and lower it in — zero insertion force, it sits in by gravity. Do not push. Lower the latch to lock it in. For Intel, the bracket clips over the CPU; for AMD AM5, the lever closes over it.
- Install RAM. Open the retention clips on both sides of the RAM slot. Check your motherboard manual for the correct dual-channel slot configuration — on most boards, slots A2 and B2 (the 2nd and 4th slots from the CPU) are correct for two sticks. Press down firmly and evenly until both clips click. RAM requires more force than feels comfortable the first time.
- Install the M.2 SSD onto the motherboard. Slide the drive in at a 30-degree angle into the M.2 slot, press it flat against the board, and screw it into the standoff. Some motherboards have a tool-less latch instead of a screw.
- Install the motherboard into the case. First confirm the I/O shield is in place (the metal plate covering the rear ports — snap it in before the board goes in). Align the motherboard to the standoffs in the case (pre-installed brass posts that lift the board off the case floor), lower it in, and screw it down. Do not overtighten.
- Install the CPU cooler and apply thermal paste. If the cooler came with paste pre-applied, clean it off if it looks dried out and apply fresh paste — a pea-sized dot on the centre of the CPU. Mount the cooler according to its instructions; most use a backplate that goes through the motherboard. Tighten the mounting screws in an X pattern (diagonal corners) to distribute pressure evenly.
- Install the GPU. Locate the PCIe x16 slot — usually the top full-length slot closest to the CPU. Press the retention tab at the end of the slot outward, seat the GPU firmly until you hear it click, then screw the GPU bracket into the case’s rear expansion slots.
- Install the PSU and route cables before plugging them in. Mount the PSU in the case (usually bottom-rear, fan facing down toward a vent). Thread your cables through the cable management channels behind the motherboard tray before connecting anything — doing this after everything is connected is the single most common regret.
- Connect all cables. Work through each one:
- 24-pin ATX power — large connector to the right side of the motherboard
- 8-pin (or 4+4 pin) CPU power — top-left of the motherboard, near the CPU
- PCIe GPU power — 6+2 pin connectors from PSU to GPU
- SATA power — if you have any SATA drives or optical drives
- Case headers — power button, reset button, power LED, HDD LED; check your motherboard manual for the correct pin layout, these are small and fiddly
- USB and audio headers — from the case front panel to the corresponding header on the board
- CPU cooler fan — 4-pin connector to the CPU_FAN header on the motherboard
- Case fans — to CHA_FAN or SYS_FAN headers
- First boot — enter BIOS. Before closing the case, do a test boot with the side panel off. Press the power button. If the system posts (fans spin, motherboard LEDs light, display shows something), press the BIOS key shown on screen (usually Del or F2). Inside the BIOS: confirm all components are detected — CPU, RAM capacity, storage drives. Then find the XMP or EXPO setting and enable it. This is what makes your RAM run at its rated speed rather than the DDR5 base speed of 4800 MHz.
- Install Windows or Linux. Create a bootable USB drive on another computer using the Windows Media Creation Tool or a tool like Rufus (for Linux). Plug it into the new build, boot to it from BIOS (usually F11 or F12 for a boot menu), and follow the installer. Windows 11 is standard for gaming builds. Ubuntu or Arch Linux if you prefer open-source — both work well with AMD hardware in 2026.
Common beginner mistakes
- Not enabling XMP or EXPO. Without it, your DDR5-6000 kit runs at 4800 MHz — the default base spec. Always enable XMP (Intel) or EXPO (AMD) in the BIOS. It takes ten seconds and is the single easiest performance gain available.
- Cable management as an afterthought. Routing cables after all components are installed is genuinely painful. Thread the large cables (24-pin, 8-pin CPU) through the case’s cable management routes before connecting them.
- Buying the case before confirming GPU length. A 350 mm GPU will not fit in a case with 330 mm maximum clearance. Check the GPU spec and case spec before purchasing either.
- Forgetting the CPU cooler standoff screws. Some coolers require a backplate or standoff screws that go through the motherboard before the board is installed in the case. Installing these after the board is in the case is extremely awkward. Read the cooler instructions before mounting the motherboard.
- Buying a cheap PSU to save money. A failing PSU under load can damage your GPU, motherboard, and storage. A reputable 80+ Gold PSU costs $10 to $30 more than a no-name unit. It is worth it every time.
Who should build vs. buy?
The hardest part of building a PC is not the assembly — it is the decision to start. Once your parts list is done on PCPartPicker and you have confirmed compatibility, the physical build is a few hours of methodical work. Most first-time builders finish in an afternoon and have a machine running by evening.
Start with your parts list. Pick a budget tier, open PCPartPicker, and put together a build. The tool will flag any compatibility issues before you spend a dollar. Once the list is solid, order the parts and set a weekend to build. The experience of pressing the power button for the first time on a machine you assembled yourself is worth it.